ChromAnomaly

Macro Lenses

Canon 100mm Macro Lens

Canon 100mm Macro Lens

My new baby. Well, almost. I finally ordered the Canon 100mm Macro USM lens the other day after it”s been sitting on my wishlist for over a year. Why? Well the sucker is expensive, but a macro lens opens up so many possibilities for photography. I can”t wait for my new lens to show up . . .

If you do a little browsing, you”ll find that I picked up one of the more expensive macro lenses out there (excluding Canon”s professional series lenses, which are insanely expensive). But I didn”t just spend extra money for fun – there are some very good reasons for the price of this lens that make it worthwhile: the f-stop, the minimum focal distance, and the USM. The other lens that was in very close competition with this one for me was the 60mm macro USM . . . which basically has the exact same specs except for the focal distance (different from the minimum focal distance I mentioned above). The 100mm lens “zooms in” farther on a subject (though not that this is a fixed focal distance lens, so technically it does not zoom at all!), while the 60mm lens provides a wider angle of view. But considering the small price difference, and the fact that the whole point of macro photography is to get really close to a subject . . . the 100mm made more sense to me.

Ok, so priority #1 when shopping for a macro lens is that it”s actually a macro lens. There are lots of lenses out there that are advertised as being macro, but really aren”t.  Macro means that the image on your CCD is at least 1:1 with the actual object. A normal lens is always less than 1:1, and crazy macro lenses will actually magnify the image bigger than 1:1 (at this point, you have basically converted your camera to a microscope, with all the inherent drawbacks of magnifying things that much. Including diffraction issues, magnifying motion to the point that the shutter click will blur your image, etc).

Now, while a 1:1 ratio may not sound like much, consider that a normal lens will take an image like a portrait (ie a person, maybe 5-6 feet tall in real life), and turn that into an image the size of your CCD which is typically 1/2 inch or less. Ok, so that”s exaggerating things a bit, because you probably know that you can get pretty close to a subject and take a picture of a much smaller area than a person. But most lenses hit their limit at around 3” from the subject, and given a standard viewable angle that means you are looking at around 6″ of real space being projected onto a 1/2″ CCD. So in layman”s terms, the 1:1 macro lens lets you magnify things about 12x bigger than a standard lens. Sound significant now?

Ok, next important part about the macro lens is the f-stop. The f/2.8 available on Canon”s 100mm and 60mm USM macros is about the best (smallest) f-stop I”ve found short of going to professional lenses. The smaller the f-stop number, the more light the lens can let in (ie the bigger the diaphram opens). And with macro photography, where you are often very close to a subject, and taking a picture of something very small (ie less surface for light to reflect off of in the first place), letting in as much light as possible becomes critical.

Minimum focal distance (as opposed to focal distance) is the shortest distance between the subject and CCD of the camera at which the lens can focus. Since the point of macro photography (usually) is to get very close to a very small subject, short minimum focal distance is a good thing. If you”re clever, you may have noticed that the 60mm lens minimum focal distance is 0.65 foot, while the 100mm lens minimum focal distance is 1 foot. So wouldn”t that make the 60mm lens better? Not quite. Remember, this is the distance from the subject to the *CCD*, not the subject to the lens. So subtracting out the length of the lenses, the 60mm lens will be 5″ from the subject, and the 100mm lens will be 7″ from the subject. And then take into consideration that the image on the 100mm lens will be almost double the size (it”s effectively “zoomed in” releative to the 60mm lens).

Ok, and last topic is the USM (ultra-sonic motor). It”s a new buzz-word at Canon, but what it really means is incredibly fast and acurate autofocusing. Which if you”re taking photos of bugs landing on flowers in super close-up, you don”t want to have to worry about your autofocus going spastic. Or god forbid, trying to manually focus on a focal plain that is probably too short for your eye to detect through the viewfinder.

So that”s all the theoretical advice on macro lenses . . . I”ll let you know how it all holds up when I get mine here in a couple days ;)

What is Colorblindness?

Ok, I’ve been working on this blog for a while now, and it’s supposed to be about photography and perception from a colorblind perspective . . . and I haven’t mentioned a thing about colorblindness yet. So let’s remedy this little problem. Whenever someone finds out that I’m colorblind, the first question I always get (ALWAYS) is, “so . . . what color is my shirt?” And if you were tempted to ask, you, like most of the population, do not understand colorblindness.

I suppose I should mention that there are multiple types of colorblindness, and that I am red-green colorblind. That’s the common type (affecting something like 10% of all males, believe it or not) and in my case is known scientifically as protanomaly (there is another type of red-green colorblindness, deuteranomaly which makes up a portion of that 10%, but they are often difficult to distinguish).

Ok, so what is colorblindness? Well people have 4 types of light receptors in their eyes: 1 type of rod, and 3 types of cones. Rods are proteins that are sensitive to a broad spectrum of light (ie all colors) – whenever light reaches a rod, it sends a signal. That means that rods can’t discriminate between colors, just intensity of light. Rods are active in low light because they’re really sensitive. Your ability to discriminate colors in the dark would be similar to what a monochromat sees normally (monochromats don’t see any color, but this is less than 1% of cases of colorblindness).

Cones, on the other hand, are sensitive to a particular portion of the light spectrum. Generically we would say that there are red cones, blue cones, and green cones . . . though that’s not entirely acurate, it’s close enough. This is why TVs, computer monitors, cameras, all sorts of image capturing and reproducing devices use RGB color – because those are the same color primaries that your eye sees. Whether you believe it or not though, EVERYONE is colorblind to certain colors. There are way more colors in the spectrum than what you can reproduce using only red, green, and blue primaries. But since humans can’t distinguish the colors, there is no need for a computer monitor to reproduce them either.

Anyway, back to being colorblind. Colorblindness is (usually) a genetic condition, and it is sex-linked (the DNA that codes for your cones is located on the X chromosome). Because males only have one X chromosome (males are “XY”), they only have one copy of the code for cones . . . if that one copy is defective, you’re colorblind. Females have two X chromosomes (females are “XX”), so unless both copies are defective, you’re color normal. By the way, there is good evolutionary reason for males to be prone to colorblindness and females to be color normal – females traditionally gathered food and needed to know the difference between a red berry and a green one, while males who were hunting benefitted from being colorblind because they can see through color-based camoflauges.

So most colorblind individuals have a “deformed” version of one of their cones (usually either the red cone or the green cone, with red cone deformations being more common). Now, the spectrum for all the cones overlap slightly, but a deformation causes the spectrum of that cone to shift closer to to one of the other cones. For example, a deformed red cone is a bit more sensitive to greens than it should be, and a little less sensitive to reds than it should be. As a result, reds don’t look as saturated or bright as they should, and some green colors can actually look red.

The part that confuses most people is that a bright saturated red still looks red to a colorblind person because there is SO MUCH red that the colorblind red cone picks up enough of it to send a signal. A very washed out red or a very dark desaturated red doesn’t have much red energy in it and thus can be missed by the defective red cone. By the same token, bright saturated greens give a strong signal to the green cone, and even if they set off the defective red cone a little the signal is swamped by the signal from the green cone . . . the colorblind brain still interpruts the color as green. Funky brownish greens or washed out greens though produce a low signal from both the normal green cone and the deformed red cone, which results in a confused signal reaching the brain.

Net, there are certain sets of colors that are easy for a normal-color person to distinguish, but look the same to a colorblind person. And when these colors are set next to eachother, the normal-color person detects a nicely contrasting image while the colorblind person sees only “noise”.

HDR Ice Storm

ice coated vines in the sun

ice coated vines in the sun

We got one heck of an ice storm in Cincinnati this past week. Actually, these things are getting to be a regular occurance around here in the winter. Must be global warming or some such thing :p

Anyway, as much as I hate the cold, and as much as I hate the way Cincinnati people drive in the winter, ice storms do have an upside – they make for some great photography. There is something really cool about things that are entirely encased in ice, like the clematis in my backyard (left). Photographing clear objects (like ice or glass, etc) comes with a unique set of problems. Namely, they are transparent.

Obviously you and I can see things like ice and glass in the real world. So why don”t they look the same on camera? It”s largely due to motion – as we move around a transparent object, we see light reflections from different angles. Our brains integrate these different views to create a mental image of the ice or glass, etc which is considerably different from the instantaneous image that our eye sees. Cameras, for better or worse, do not have the advantage of a brain. They capture the image exactly the way your eye sees it, without the benefit of additional knowledge about how transparent objects behave.

The result of all this is that most photos of transparent objects either can”t be seen, or are covered in glare. But the way your brain thinks a transparent object should look is more like the photo of the ice above. So what”s the difference? Notice where the highlights are located on the vines (and where they aren”t). When photographing a transparent object, the light must either come from only the edges, or only the center. If you have even lighting, you will not see the ice. If you have a large lightsource behind you, you will only see glare. In the case of the above photo, the sun was above the ice that I wanted to photograph, and it was blocked out of the bottom half of the image by a hill behind the vines – the sunlight could only hit the very top edges of the ice, and as a result the ice is well defined.

I know, the sun”s reflections show up at the bottom edge of the ice, but that”s due to the refractive index of a thick piece of ice. Trust me, the light is hitting the top edge of the ice, and that”s why you can see the edge. You”ll probably also notice that I took a photo of the sun, which is normally way to bright to show up in a photo without completely washing out the foreground. I accomplished this using Auto Exposure Bracketing (a standard feature of most SLRs) and combining the three resulting exposures with Photomatix Pro, a program for creating HDR (high dynamic range) images. More on HDR later, but suffice it to say that it allows you to capture a larger range of contrast than standard images (in much the same way that your eye interprets a scene with very high contrast).

Oh, and in case you”re curious, the hexagonal spots in the upper right of this image are lens flare. Usually lens flare is a bad thing, but personally I like it in some images. The same thing causes the shiny beams from the sun and the sun reflections (usually a good thing), though many photographers would consider any lens flare large enough to create a defined hexagon to be bad. It”s a personal thing though – I don”t think it detracts from the photo in this case, and if anything it reinforces just how bright that sun was.

Gigapixel Photos – Not as cool as they sound

I was browsing my latest Nasa Tech Briefs newsletter (I know, I’m a big dork, right?) and I came across a new “technology” that sounded pretty cool – gigapixel photos. Sure, I’m a sucker for new technology, but this was apparently developed for the Mars Rover, so it’s got to be cool.

I started reading a little farther, and the article started throwing in words like “robotic” and “NASA engineered software” – sure fire ways to get a techie’s heart rate up. And then finally it explained what the technology does. It’s a camera mount that moves in a grid pattern to take 50-100 photos of a scene. And then the special software stitches them together into one massive photo. Wow, a robot that . . . wait, it just takes a bunch of photos in a grid arrangement? I’m pretty sure I could build that in my basement. And why do I need a “robot” for that? A few incremental scratch marks on my tripod would accomplish the same thing.

Well maybe it’s the software that’s so special. Let’s see, it takes a bunch of photos laid out on a grid and assembles them into one big photo. That doesn’t sound too hard. But ok, it has to deal with little overlaps between the photos, and any irregularities in the x-y coordinates of the device (though with a robot, I’d hope those are fairly precise!), and some angular distortion resulting from lens construction and the fact that the CCD is larger than a point . . . but doesn’t that free software that came with my camera do that already? Yes, in fact it does. And just in case it doesn’t do a good enough job for you, PS has an amazingly good panorama photo stitcher.

Ok, but all the overkill on the technology aside, you now have a gigapixel image. It’s huge! It has incredible detail! It . . . can’t be viewed on a normal monitor. Well it can, but it looks just like an ordinary photo. That sucks. But look how far you can zoom in! You can view an entire city scape, and then zoom in on a single store sign. Or . . . I could have taken a photo of the city scape, and a photo of the store. In fact, that’s basically what I had to do anyway. I don’t get it – gigapixel images just aren’t cool, not even with NASA engineering.

Syracuse – Northern Wasteland of Broomball

So I spent last weekend in Syracuse. Yes, I voluntarily traveled to cold snowy Central New York in January. But for one weekend every January, Syracuse is the Mecca of North American broomball, hosting the annual Can-Am Broomball Tournament. Syracuse is also home to the annual ass-kicking of Cincinnati broomball teams (as in, we get our asses kicked quite thoroughly by big burly Canadians who think broomball is a professional sport).

Anyway, once you get used to the frigid air and the intricate details of the mercy rule (if a team is up by 4 or more points with less than 10min left in the game, they win. we were rather proud to hold all of our opponents to less than a 10 point spread when the games were called :) ), it”s actually a rather fun trip. Apparently in Canada, there are only 3 things to do for fun: watch hockey, play broomball, and drink. So needless to say, there are some fun parties back at the hotel. All in all, a good trip this year. Aside from breaking my thumb at least (and yes, I broke it during a game, not a party!). Next year I will remember to get out of the way when my goalie charges the big burly Canadian I”m chasing (we sandwiched him, and he landed on my hand. and actually he was from Minnesota, but that”s close enough to Canada).

Broomball tournaments are pretty much my only opportunity to practice sports photography. Probably because I don”t like watching most sports and only make an exception when I know the people playing (or for hockey. I like hockey). Sports photography definitely has some interesting challenges, and I still don”t think I fully understand it. I”ve watched people with cheap cameras stop some decent action shots without knowing what they”re doing. Meanwhile, I”m sitting here with a Canon 40D and in the (albeit poorly lit) ice rink I had to crank up my ISO to 1600 just to get a shutter speed of 1/200 at the maximum aperture of my lens. Granted, I could buy a more expensive lens to help . . . but this still seems ridiculous.

If you didn”t follow that, ISO 1600 means turning up the “gain” on the image sensor . . . which means magnifying the amount of grain. Shutter speed of 1/200 means I could stop relatively slow motions, but people sprinting or broomballs flying resulted in a lot of blur. And maximum aperture (f5.6 if you”re wondering) means a big hole that lets in lots of light . . . and makes for a very short focal plane. Which means frequently I was focused on, say, a person”s stick (by accident) which resulted in their body being out of focus. I obviously couldn”t use a flash both because it would have been distracting to the players, and the flash is only good to about 16 feet in front of the camera . . . and I was taking photos from the 20 to 100 feet range.

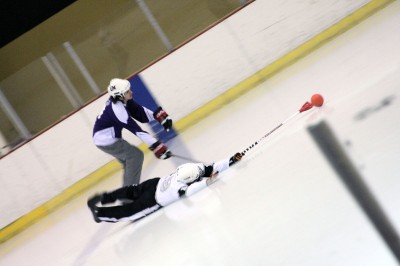
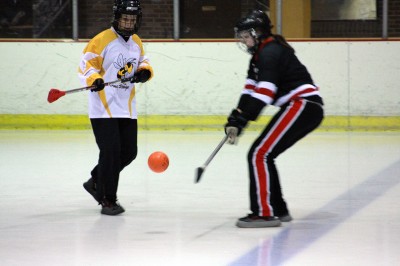
Ice rink lighting is also apparently miserable for color cast (ie it”s yellowish), and it casts terribly harsh shadows. That last one surprised me actually. The lights are pretty far overhead, which normally would soften them a bit (think of the light spreading out over space), plus the ice is white and reflective, which should have thrown some light back up from the bottom. But obviously I was wrong. Anyway, here are a couple of the better photos I got just to prove that I captured some decent ones.

Shot!

Shot!

Diving for the ball

Diving for the ball

A nice lift

A nice lift

Of Engineers and Designers

I’ve been thinking about the plight of the modern scientist / engineer. We were the powerhouse of the Industrial Revolution, the architects of the Information Age. The most respected voice of the last century or more. And now we are tucked away neatly into little cubes. If we are too vocal, too dissatisfied with the status quo, we might be “upgraded” to an office in a back hallway . . . so managers can avoid our critical gaze and sharp tongues. A necessary evil.

Meanwhile artists and designers, long the idle and unemployed of society, have found themselves in high demand by large and reputable companies. They are given “creative spaces” and “creative time”. They are wined and dined like royalty.

Now don’t get me wrong, this isn’t a “woe is me” story. And I don’t disrespect designers – afterall, there must have been a damn smart designer somewhere that gained his (or her) profession a respectable name. But hear me out.

Scientists are now being taught about “design thinking”, being told that they need to find more “creative solutions”. Which I think is an excellent idea, aside from the fact that someone is assuming that scientists aren’t creative by nature (excuse me, but the reason I studied science was because of world of possibilities that it opens up. and an open air cube isn’t what I had in mind). Anyway. At the same time we are being told that we’re too expensive (this is a tough economy after all), so we need to become more efficient and find ways to measure and prove that we are being creative.

So my question here is: if we expect scientists to be creative, why not give them the type of environment that designers “require” to be creative? (Or if the environment isn’t really required, then how come the designers don’t have to live in cubes? But I hope that’s not the conclusion you draw from this).

Designers get their inspiration from unrelated things. Car designers study wild animals. Perfume bottle designers study male and female figures. These are now classic examples. But GM once told designer Bill Mitchell to “make this car look cool and powerful”, and Bill Mitchell went fishing. It’s a good thing he didn’t get fired though, because he came back with the design for the classic 1963 Corvette Sting Ray inspired by a Mako shark. The point is that neither Bill nor his boss knew that a shark was going to be the inspiration for the car.

I like photography. A lot (in case it doesn’t show). But P&G didn’t hire me because they thought a photographer would have the perfect insight into making diapers fit better. Nor did they hire me because my background in biochemistry was going to explain the physics of a diaper. Actually as far as I can tell they hired me because I sat down at my interview and explained how I thought a diaper could be improved to fit better (when asked – I didn’t prepare that one ahead of time :p ) But I can assure you that I have employed photography, video editing, biochemistry, psychology, health science, physiology, neurology, mathematics, design, architecture, rock climbing, and ok, maybe a little physics to improving diaper fit. Honest.

So that certainly does beg the question . . . why not give scientists the space to be a little more creative?

Camera Models – why I love Canon

Alright, so now that you understand it doesn”t really matter what camera you buy, I”m going to suggest a camera to buy :P If you don”t like my suggestion though, I certainly won”t hold it against you (in fact I”ll even suggest some alternatives!) . . . and you will still be able to take great pictures.

To recap the previous articles, a) buy a digital camera, b) buy an SLR, c) don”t pay much attention to megapixels. The two most important considerations for the camera are the quality of the optics, and the quality of the CCD (image sensor) . . . and there is no standard measure or marketing term for these factors.

For optics quality, the best cameras are Canons and Nikons – they”ve been the best for years, and continue to outperform other cameras. Between the two brands, optic quality goes back and forth depending on who”s released the latest upgrade. Canon had a better platform for awhile (they”ve been placing the focus motor in the lens rather than the camera body for years, which speeds up the performance among other things), but Nikon recently switched over to a similar platform which is holding its own.

For image sensor quality, Canon and Nikon have also historically lead the pack. Again, quality between the two of them tends to go back and forth model to model. Recently, several new players, most notably Sony, have entered the arena of high quality image sensors. In fact Sony”s CCD is good enough that they teamed up with Carl Zeiss (a microscope and precision optics manufacturer) to try and bring their optics into a competitive range with Canon and Nikon. Sony has been successful in developing a line of SLRs that have Canon and Nikon nervous, but in my opinion they are still playing outside their core competancy and have some work ahead of them before I would recommend one of their cameras.

Between Canon and Nikon as I mentioned, it”s sort of a toss-up on which brand you buy. So why do I buy Canon? Because they have more experience with in-lens motors, because I used to shoot with a 35mm Canon Rebel and got used to the controls, and because all my old lenses are compatable with my new cameras! That”s it.

Canon Rebel XSi

Canon Rebel XSi

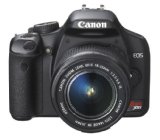
Ok, Canon still has a wide range of SLRs though. So which to buy? I would honestly go with the Rebel XSi to the left. “But that”s the cheap one!” you might say. Right. It”s probably all you need. Even if you”re a budding professional, it”s probably all you need. I shot with the precursor of this model for years, and I upgraded for 1 reason only – I need a faster shooting rate (frames/second) to capture multiple exposures of moving subjects and a larger burst shot capacity (number of photos that can be taken before the memory card write speed slows down the shooting rate). If you don”t need to shoot lots of exposures quickly, there is almost no reason to buy anything more expensive than the Rebel XSi.

canon40d

Canon 40D

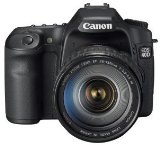
If, on the other hand, you do need high speed shooting capability (for example to minimize blur for HDR photos, or if you are heavy into sports photography), then the Canon 40D is your best value. I know, it”s not Canon”s most expensive model either. I”m trying to save you some money – the new 50D doesn”t add much other than some more megapixels, and a moderately increased useful range for low light photography. That”s it. And the 5D (the next step up) almost triples the price.

By the way, the product links above include both the camera body and a lens. Both cameras are fully compatible with the entire EOS line of lenses, so if you don”t need a lens here is the Rebel Body Only or the 40D Body Only. The 40D actually has a couple options for the lens that comes with it if you buy as a kit, but the 28-135mm included in the above link is probably your best bet quality-wise.

That”s all you should need! Time to get shooting :) Ok, if you want to browse around Canon”s other offerings by all means go ahead. Or if you want to try your hand with a Nikon, look for cameras with similar price points and features as one of the Canons I mention above. You really can”t go wrong.

Camera Models – why megapixels are meaningless

Most people who go out to buy a new camera are shopping for megapixels. The more MP the better, right? Well, yes . . . but there are more important factors than the total number of pixels the camera can capture. And there is more than one way to measure pixels.

Ok, a quick diversion into color space. For all intents and purposes, electronic image formats see pixels in three colors – red, green, and blue (I”m simplifying here, so if you really want the details I will be talking plenty about color space in other posts). Your eye also uses three colors to see, so it makes sense that we replicated that system to reproduce images electronically. Anyway, if you see “purple” it”s actually being produced on your screen by:

  • red pixel: on
  • blue pixel: on
  • green pixel: off

So every “color” requires three pixels. This applies both to the way the camera captures the image (the camera “sees” red pixels, blue pixels, and green pixels) as well as the way your monitor displays the image (with little red, blue, and green lights). But when you save this image, “purple” only takes up one “pixel” in the file, not three. So some manufacturers count the number of *file* pixels that the camera can caputer, and other manufacturers count the number of *sensor* pixels (which is 3x the number of file pixels for the same camera).

But wait, it gets better. Just because the camera”s sensor *records* 12MP of data doesn”t mean that it recorded each pixel acurately! In fact, the amount of noise that can occur in a high density sensor sometimes outweighs the benefit of having more pixels. So why do companies makes cameras with useless pixels? Because most people buy based on megapixels. Oh, and did I mention that 80% of computer monitors (at the time of this writing) are configured to display . . .0.7 megapixels. And a large portion of those monitors are hard capped at 0.7 megapixels. That means you are only using 10% of the pixels in your high resolution image!

Don”t get me wrong, there are lots of reasons to want more pixels than you see. But for purposes of demonstration, let”s take a look at what happens when you have lots of “ok” pixels versus a few “good” pixels. For this example “good” pixels acurately represent the original scene, whereas “ok” pixels have noise in them – characteristic of what one might find in a cheap camera. Think of it as static in the camera”s sensor. Good cameras are static free, but it”s difficult (and expensive) to eliminate the static.

The two images below are identical, shot with a 10 megapixel (good) camera. The image on the top was initially downsampled to just 1 megapixel (throwing out 90% of the original pixels), but the image “quality” was maintained. The image on the right was left at 10 megapixels, but 10% of the pixels were given random static noise. Both images were then resized to a typical monitor viewing size. So which do you prefer, more pixels, or better quality pixels?

Small clean sensor (top) vs big noisy sensor (bottom)

Small clean sensor (top) vs big noisy sensor (bottom)

Camera Models

Ok, it”s officially a new day, so time for an early morning post that”s actually about photography :) Everyone”s first question about taking photos is “what kind of camera should I buy?”. So I feel obligated to reiterate the age old advice: this is the least important decision you will make as a beginner!

Artists will tell you that photos taken with a daguerreotype can still be beautiful, so focus less on the camera you buy and more on what you do with it!

That said, a camera of some sort is still a prerequisite for taking pictures, so a discussion of your options is probably justified. First choice: film or digital. As much as some purists might insist otherwise, a modern digital camera give you so much more flexability and so many more learning opportunities that there is very little reason to buy a film camera anymore. If you like the aesthetics of a film camera, then by all means buy one. But as a beginner I would highly recommend digital so that you can instantly review the impact of setting changes, you don”t have to worry about “wasting” film, and there are no film developing variations to confound the camera changes you made intentionally.

Next choice: SLR or point-and-shoot. Personally I would always suggest an SLR – nearly all models now have point and shoot capability, but as you learn and grow you will appreciate the additional flexibility that the SLR provides. If you just want to be able to take snapshots . . . well, then I”m not sure why you”re reading this blog. Go buy a point-and-shoot, and stop reading about photography. The two advantages that point-and-shoots have are 1) compact size (sometimes), and 2) less expensive. Before you argue that there are some really expensive point-and-shoots out there, let me just say that the really expensive models offer similar lens performance to an SLR plus two lenses, which definitely makes them cheaper.

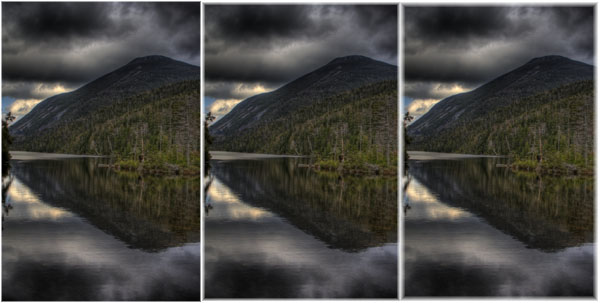
So why buy and SLR afterall? Oldschool photographers will tell you that the field you see in the viewfinds matches what shows up in the final picture better, but this is rarely even a consideration anymore due to the ability to digitally crop. And the difference is usually a 90% field of view on a really cheap model to a 95% field of view on a standard SLRto a 98% field of view on a top of the line camera. Think you can really tell the difference? Take a look at the example below:

field of view differences

field of view differences

You can probably tell that the white area around the images changes, but can you really tell the difference in the field of view? From left to right the images represent 98%, 95% and 90% field of view. By the way, that”s an HDR image taken in the Adirondack Mountains (Avalanche Lake to be precise in case you were interested).

So it”s not field of view . . . what makes SLRs so special? The two biggest advantages are the target audience (serious photographers), and the ability to change lenses. Changing lenses is self explanatory, and I will leave a discussion of lenses for another post. But don”t look at me like I”m crazy when I say target audience is important! The camera manufacturer had *you* in mind when (s)he designed the SLR, which means there is no compromise in accessability of truely powerful functions. In layman”s terms, this means it”s easy to screw up a photo. In photographer”s terms, it”s the difference between capturing a great photo and missing it. Point-and-shoot manufacturers hide the powerful features – the ones that were often the *only* controls on film cameras – buried in layers and layers of menus. You will never manage to dig out the shutter speed control in time to capture a hummingbird hovering or the ferrari tearing up your suburban street. The reason is to prevent people who don”t know what they”re doing from accidentally setting these controls incorrectly. But you”re not one of those people. You want to take *really* good photos, not just better snapshots. Right?

Stay tuned, details on specific SLRs is coming tomorrow . . . or maybe later today :)

Broomball Champions

Ok, so my first post is totally unrelated to photography, sorry everyone!

I just spent all day yesterday at a broomball tournament in Indianapolis. We played 5 games in 7 hours, one of which went into double overtime :eek: Needless to say I am a bit sore today, hehe. Anyway, here’s the lowdown on the tournament . . . We walk out on the ice to find it wet cut (broomball regulations say it’s supposed to be dry cut), and then find out we’re using stitched balls instead of rubber ones. That threw off the whole team for a bit, but we won our first game and were feeling pretty good about it. Then had a break where we watched “The Grinch” take an easy first half and then slaughter their opponent in the second. Good news for us, since we played “The Grinch” next and lost :( We battled our way through the loosers bracket to end up facing the still undefeated Grinch in the championship game of a double elimination tournament. Tie game. 5 min sudden death overtime still didn’t determine a winner. On to the shootout, which we pulled out of with a 1-0 win :!: But that just meant one more game against the dreaded Grinch . . . and by this point both teams were absolutely exhausted!

End result of the tournament: the Cincinnati Royals are the Broomball Champions of Indianapolis!! (and yes, we looked hot wearing our purple jerseys)

I didn’t score in the tournament (I’ve been on a dry spell for awhile now), but I did have 2 assists. That will do for me :) And I lead the tournament for penalty minutes :lol: Yup, big brute that I am (5’7″, 130lbs) I just couldn’t help drawing the first whistle in the entire tournament when a guy twice my size tripped over my foot as we fought for the ball and took a deliberate dive. No one else could catch up with my 2min in the penalty box either, though our team did draw the only other two whistles blown in the rest of the tournament. It was so bad that guys who were “tripped”, “slashed”, or “roughed” were laughing and patting the offending players on the back admitting that it was a terrible call. Oh well.

There would be some photo lessons involved with this story, but the pics from the tournament aren’t posted yet (I didn’t have a camera – I was too busy playing!). There was some brutal sublimation going on, and because the rink didn’t have dehumidifiers there was so much fog and haze that the goalies couldn’t see eachother by the end of the day. Which certainly makes for some interesting photo-taking conditions. I’ll see if I can snag a couple to talk about here soon :)